Superscript in PowerPoint: How to Add, Type & Use Superscripts in PPT (All Methods Explained)
Superscript in PowerPoint is used when you want a small character to appear slightly above normal text. You often see this in exponents (x²), footnotes¹, citations, trademarks™, and scientific presentations.
But here’s the problem many students and teachers face: You spend time formatting the perfect x² in PowerPoint, only to watch it become plain “x2” when you share your presentation online or export it to PDF.
In this complete, beginner-friendly guide, you will learn every single way to add superscript in PowerPoint. We’ll cover hidden buttons, keyboard shortcuts for both Windows and Mac, equation tools for math class, and most importantly the permanent solution that keeps your superscripts looking perfect everywhere.
By the end, you’ll be able to confidently add professional superscripts to any PowerPoint presentation, whether you’re creating a science project, math report, or research presentation.
What Is Superscript in PowerPoint?
Let’s start with the basics. What exactly is a superscript?
A superscript is a character (usually a number or letter) that sits slightly above the normal text line and appears in a smaller size. Think of it like text that’s been given a gentle lift upward.
Simple Example to Understand:
- Normal text: x2 (the number 2 sits on the line)
- Superscript text in PowerPoint: x² (the number 2 floats above the line)
More Examples You’ve Probably Seen:
- Mathematical exponents: 10³ (that means 10 × 10 × 10)
- Ordinal numbers: 1ˢᵗ, 2ⁿᵈ, 3ʳᵈ (first, second, third)
- Units of measurement: km² (square kilometers), m³ (cubic meters)
- Chemical notation: CO²⁺ (carbon dioxide ion)
- Footnotes and references: See reference¹ at the bottom of the slide
Where Do We Use Superscript in Presentations?
Superscript isn’t just for math geniuses it’s used in many types of school projects and professional presentations. Here’s where you’ll most often need it:
Math & Science Classes:
- Algebra slides: Showing x², y³, or (a+b)²
- Physics presentations: Equations like E=mc²
- Chemistry lectures: Chemical formulas and ions
- Geometry: Area calculations with units like cm²
Research & Reports:
- Citation markers: Small numbers like ¹, ², ³ that point to references
- Footnotes: Additional information at the bottom of slides
- Academic papers: Statistical notation and scientific formulas
Business & Professional Presentations:
- Trademark symbols: ™ and ® symbols
- Copyright notices: © 2026 Your Name
- Financial reports: Percentage calculations and exponents
- Technical documentation: Engineering formulas and measurements
Charts & Data Visualization:
- Graph labels: Units like m²/s²
- Table headers: Scientific notation in data tables
- Diagram annotations: Reference markers in complex diagrams
Bottom line: Whether you’re a middle school student making a science project, a high school student preparing a math presentation, or a college student working on a research paper, knowing how to properly use superscript in PowerPoint is an essential skill.
The Big Secret About PowerPoint Superscript
This is the most important thing you need to understand before we start learning the methods:
PowerPoint superscript is formatting, not a real character.
What does this mean? Let me explain in simple terms:
When you make “x2” into “x²” in PowerPoint, you’re not actually changing the character. You’re just telling PowerPoint to display the number 2 in a special way smaller and higher up. But behind the scenes, PowerPoint still remembers it as just plain “2”.
Why This Matters: The Copy-Paste Problem
Because superscript is just visual formatting (like changing text color or making it bold), it often disappears when you:
- Copy slides to Google Slides for online sharing
- Export to PDF to submit your assignment
- Paste into an email to send to your teacher
- Upload to school platforms like Google Classroom or Canvas
- Share on presentation websites or learning management systems
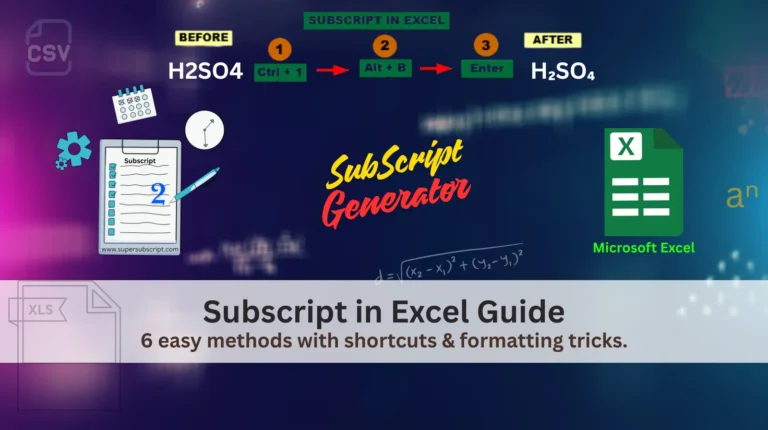
Real Student Example: You spend an hour perfecting your chemistry presentation with H₂O and CO₂ formulas. It looks amazing in PowerPoint. You export it as a PDF and submit it. Your teacher opens it, and all the chemical formulas show as H2O and CO2 instead. Your carefully formatted presentation has lost its scientific accuracy.
This is why many students and teachers now use a different approach: creating real superscript characters that can’t disappear. We’ll cover this permanent solution after learning PowerPoint’s built-in methods.
Method 1: Add Superscript Using Font Settings
This is the official Microsoft way and the first method every beginner should learn. It’s like following a recipe step-by-step simple and reliable.
Step-by-Step Guide:
- Open PowerPoint and create a new presentation or open your existing one.
- Insert a Text Box where you want to type:
- Click the Insert tab
- Click Text Box
- Click on your slide and drag to create a box
- Type something like:
x2(that’s “x” followed by the number 2)
- Select Only the Number (This is the most important step!):
- Use your mouse to click and drag over just the number 2
- Make sure you don’t select the letter “x”
- Your selection should look like: x[2] (with only the 2 highlighted)
- Open Font Settings:
- Go to the Home tab at the top
- Look in the Font section (where you choose font type and size)
- See that tiny arrow in the bottom-right corner of the Font section? Click it!
- Apply Superscript:
- A new window called “Font” will pop up
- Look for the Effects section
- Find the checkbox labeled Superscript
- Click the checkbox to add a checkmark ✓
- Click OK and watch the magic happen!
Your x2 should now look like x²!
Why We Select Only the Number:
Superscript formatting applies to whatever text you have selected. If you select the whole word “x2”, both characters will become superscript, making them both small and raised—which looks wrong. We only want the number to be superscript.
When Should You Use This Method?
Pro Tip
After applying superscript, you can continue typing normally. The superscript mode doesn’t stay on unless you keep the checkbox checked.
Method 2: PowerPoint Superscript Shortcut
Once you’ve used Method 1 a few times, you’ll want something faster. That’s where keyboard shortcuts come in! A shortcut is like a secret code that tells PowerPoint what to do without clicking through menus.
The Superscript Shortcut for Windows:
Press these three keys together: CTRL + SHIFT + +
(That’s the Control key, the Shift key, and the Plus key all at the same time)
How to Use It (Step-by-Step):
- Type your text normally:
x2 - Use your mouse to select only the number 2
- Press and hold CTRL and SHIFT with your left hand
- While holding those, press the + key with your right hand
- Release all keys
Instant result: Your x2 becomes x² in less than a second!
To Turn Superscript Off:
- Select the superscript text (the ²)
- Press the same shortcut again:
CTRL + SHIFT + + - It returns to normal text
For Mac Users (Important Difference!):
Mac keyboards work differently. Here are your options:
- Option A: Use the Mac Shortcut (if it works on your version):
Command + Shift + +(Command key instead of Control)
- Option B: Menu Method (always works):
- Select your text
- Go to Format in the top menu
- Choose Font
- Check Superscript
- Click OK
- Option C: Create Your Own Shortcut (Advanced but worth it):
- Go to System Preferences → Keyboard → Shortcuts
- Choose App Shortcuts
- Click the + button
- Select Microsoft PowerPoint
- Type exactly: Superscript
- Choose your preferred keys (like
Cmd + =)
When Should You Use This Method?
Method 3: Insert Superscript Symbols
This method is completely different from the first two. Instead of formatting regular text, you’re inserting actual superscript characters that are designed to be small and raised.
Step-by-Step Guide:
- Click where you want the superscript in your text box
- Go to the Insert tab at the top
- Click Symbol (usually in the far right section)
- Choose More Symbols from the dropdown
- A large dialog box will appear. Here’s how to navigate it:
- Look for Subset dropdown menu
- Choose Superscripts and Subscripts
- You’ll see all available superscript characters
- Click on the symbol you want (like ² or ³)
- Click Insert
- Click Close
Advantages of This Method:
Limitations to Know:
When Should You Use This Method?
Pro Tip
You can use this method alongside formatting. For example, use symbols for numbers and formatting for letters when needed.
Method 4: Writing Exponents Using Equation Tool
If you’re creating math or science presentations, this method is like having a professional typesetting tool built right into PowerPoint. It’s specifically designed for mathematical expressions and makes your work look textbook-perfect.
What Are Equations in PowerPoint?
Equations are special containers that understand mathematical rules. When you use the Equation tool:
- Fractions look like real fractions (½ not 1/2)
- Square roots have the proper symbol (√ not sqrt())
- Exponents are perfectly positioned
- Everything scales and aligns correctly
Step-by-Step Guide for Exponents:
- Click where you want your equation on the slide
- Go to Insert → Equation (or click the π symbol in some versions)
- A new Equation Tools tab will appear with special formatting options
- Type your base (like “x”)
- Press the caret key (^) on your keyboard
- Type your exponent (like “2”)
- Press the Spacebar to convert it to proper formatting
Watch what happens: Your x^2 automatically becomes x² with perfect positioning and sizing!
More Advanced Examples:
- For multiple exponents:
- Type:
x^(n+1)then press Space → becomes xⁿ⁺¹
- Type:
- For fractions with exponents:
- Use the fraction template from Equation Tools
- Type numerator and denominator
- Add exponents where needed
- For chemical equations:
- Use the subscript and superscript buttons in the Equation Tools
- Create professional-looking formulas like H₂O or CO₂
Why Teachers Love This Method:
Student Challenges to Know About:
When Should You Use This Method?
Classroom Tip
If your math teacher complains about “sloppy equations” in presentations, show them you know how to use the Equation tool. It makes a huge difference in professionalism!
Method 5: Add Superscript Button to Ribbon
If you use superscript frequently (like in daily science or math classes), constantly going through menus or remembering shortcuts can slow you down. This method puts a superscript button right on your toolbar for one-click access.
What Is the Ribbon?
The Ribbon is the bar across the top of PowerPoint with all the tabs (Home, Insert, Design, etc.). Each tab has buttons for different functions. By default, the superscript button is hidden, but you can add it.
Step-by-Step Guide:
- Right-click anywhere on the Ribbon (the area with Home, Insert, etc.)
- Select Customize the Ribbon from the menu
- A new window opens with two columns
- In the right column, decide where you want the button:
- Click on the tab where you want it (usually Home)
- Click New Group to create a space for it
- Name it something like “My Shortcuts”
- In the left column, change the dropdown to All Commands
- Scroll down the list (it’s alphabetical) and find Superscript
- Select Superscript and click the Add >> button
- Click OK to save
Now look at your Home tab! You should see a new group with a superscript (x²) button.
How to Use Your New Button:
- Select the text you want to superscript
- Click your new x² button
- Done! No menus, no shortcuts to remember
Bonus: Add a Keyboard Shortcut to Your Button
You can make it even faster:
- Right-click your new superscript button
- Choose Add to Quick Access Toolbar (the tiny toolbar above the Ribbon)
- Now you can press Alt + [number] to use it
(The number appears when you press Alt—usually 1, 2, or 3)
Why This Method Is a Game-Changer for Students:
When Should You Use This Method?
Pro Tip
Add both Superscript and Subscript buttons if you work with chemical formulas or mathematical notation regularly.
Why Superscript Sometimes Disappears (The Frustrating Truth)
This is perhaps the most important section for students who submit work online. Let’s understand exactly why your carefully formatted superscripts vanish.
The Technical Reason (Simplified):
When you use Methods 1, 2, or 4, you’re applying formatting instructions to regular text. Think of it like this:
- The actual text is still “x2”
- PowerPoint adds an invisible note that says “make the 2 small and raise it up”
- When you copy this to another program, many programs ignore PowerPoint’s special notes
- They only see “x2” and display it that way
Where Formatting Gets Lost:
- Exporting to PDF:
- Some PDF converters don’t preserve PowerPoint formatting perfectly
- Result: Your x² becomes x2 in the PDF
- Uploading to School Platforms:
- Google Classroom, Canvas, Blackboard, etc.
- These platforms often reformat content for web display
- Result: Lost superscript formatting
- Copying to Email:
- Gmail, Outlook, Yahoo Mail
- Email programs strip “fancy formatting” to ensure compatibility
- Result: Plain text without superscript
- Pasting into Google Slides:
- Google’s equivalent of PowerPoint
- Doesn’t always understand Microsoft’s formatting rules
- Result: Inconsistent or missing superscripts
- Sharing via Online Converters:
- Websites that convert PPT to other formats
- Often lose special formatting during conversion
Real Student Story:
“I spent three hours on my chemistry presentation. All the formulas looked perfect: H₂O, CO₂, H₂SO₄. I exported it as PDF and submitted it on Google Classroom. When my teacher graded it, she marked me down because all my formulas showed as H2O, CO2, H2SO4. She said it was chemically incorrect. I had to explain it was a formatting issue, but the grade stood.“
The Pattern You’ll Notice:
The more you share or convert your presentation, the more likely formatting is to break. This is why so many students and teachers are moving away from PowerPoint’s built-in formatting for important work.
The Permanent Solution: Unicode Superscript Generator (Recommended)
Now we reach the solution that solves all the problems we’ve discussed. This method doesn’t use PowerPoint’s formatting at all, it creates real superscript characters that work everywhere.
What Are Unicode Superscript Characters?
Unicode is a universal system that gives every character in every language a unique code. Some of these characters are specifically designed as superscripts:
Common Unicode Superscripts
- Numbers: ¹ ² ³ ⁴ ⁵ ⁶ ⁷ ⁸ ⁹ ⁰
- Math symbols: ⁺ ⁻ ⁼ ⁽ ⁾
- Some letters: ⁿ ᵀ ᴹ ᴬ ᴮ ᴰ ᴱ ᴳ ᴴ ᴵ ᴶ ᴷ ᴸ ᴼ ᴾ ᴿ ᵁ ⱽ ᵂ
These aren’t formatted text they’re actual characters designed to look superscripted.
How a Superscript Generator Works:
- Visit our Superscript & Subscript Generator
- Type what you need (like “x2” or “10^3” or “1st”)
- Click Convert
- Copy the result (like “x²” or “10³” or “1ˢᵗ”)
- Paste into PowerPoint
That’s it! You now have real superscript characters in your presentation.
Before/After Comparison:
Before (PowerPoint Formatting):
- Type
x2in PowerPoint - Format it as superscript → looks like
x² - Copy to email → becomes
x2❌ - Export to PDF → becomes
x2❌ - Upload to Google Classroom → becomes
x2❌
After (Unicode Characters):
- Generate
x²in our tool - Paste into PowerPoint → looks like
x² - Copy to email → stays
x²✅ - Export to PDF → stays
x²✅ - Upload to Google Classroom → stays
x²✅
Try Our Superscript Generator Now →
All Methods Compared: Which One Should You Use?
Let’s break down all five methods plus the generator solution to help you choose:
| Method | Easy to Learn? | Speed | Reliability | Best For |
|---|---|---|---|---|
| 1. Font Settings | Very Easy | Slow | Breaks often | Complete beginners |
| 2. Keyboard Shortcut | Medium | Very Fast | Breaks often | Daily PowerPoint users |
| 3. Symbol Insert | Medium | Slow | Mostly reliable | Citation numbers, occasional use |
| 4. Equation Tool | Difficult | Slow | Sometimes breaks | Math/science presentations |
| 5. Ribbon Button | Easy | Fast | Breaks often | Frequent users who forget shortcuts |
| Unicode Generator | Very Easy | Fast | Never breaks | Everything, especially online work |
Quick Decision Guide:
- If you’re just starting out: Use Method 1 to learn the basics.
- If you use PowerPoint daily: Learn Method 2 (shortcut) for speed.
- If you’re doing math/science: Master Method 4 for professional equations.
- If you submit work online: Always use the Unicode Generator—it’s the only method guaranteed to work everywhere.
- For a specific solution on formatting slide headers, this Reddit discussion covers how to add superscript in PowerPoint within titles and text boxes.
Frequently Asked Questions
Final Thoughts & Next Steps
You now have a complete toolkit for working with superscripts in PowerPoint. Let’s review what you’ve learned:
Your New Skills:
- Method 1: The beginner-friendly way through Font Settings
- Method 2: The speedy keyboard shortcut for daily use
- Method 3: Inserting real superscript symbols
- Method 4: Professional equations for math and science
- Method 5: Customizing PowerPoint with your own superscript button
- The Best Solution: Generating Unicode superscripts that work everywhere
The Key Insight:
PowerPoint’s built-in superscript works well inside PowerPoint, but often fails when you share, export, or convert your presentation. For any work that leaves PowerPoint, Unicode superscripts are the reliable choice.
Your Action Plan:
For your next PowerPoint project:
- Try Method 2 (
CTRL + SHIFT + +) for speed during creation - Use our Generator for any content that will be shared online
- Save the Unicode characters you create for reuse in future projects
- Teach a classmate how to avoid the “disappearing superscript” problem
Remember This Rule:
“If it stays in PowerPoint, use shortcuts. If it goes anywhere else, use Unicode.”
Continue Learning:
- Explore our guide on Subscript in PowerPoint for chemical formulas
- Learn about Superscript in Word for your written reports
- Learn about How to add subscript in word?
- See our tutorials on Superscript in Excel and Subscript in Excel.
The most successful students are those who not only complete their work but present it professionally. Proper superscript formatting might seem like a small detail, but it shows teachers and professors that you pay attention to accuracy and professionalism valuable skills in any academic or professional setting.